Harnessing the Power of AI Image Trends in Content Creation
Using an AI Image Generator has quickly become one of the most practical tools for creators who want to produce visuals fast, without a steep learning curve.
So whether you’re designing social media posts‚ banners‚ marketing materials‚ or anything else‚ this guide is for you․
Right now‚ most writing about AI images tends to be tutorial-focused‚ with lots of step-by-step prompts‚ style recommendations‚ or practical workflows․
This article will follow that model‚ but not necessarily repeat the exact wording․
Why AI image content is everywhere right now
Generative AI image generation is no longer a new concept‚ but various tools enable users to write a short sentence or two to create a high-fidelity image using a description․
With its speed‚ variety‚ and personalization‚ it’s no wonder that tutorials and how-to articles are plentiful on the web․
Instead of scrolling through stock libraries‚ multiple variations of a concept‚ with different colors‚ moods‚ and compositions can be generated in minutes to suit a particular mood or style․
This also explains the prevalence of articles about “how to improve” or “templates for” images generated by AI‚ including prompts‚ aspect ratios‚ and style keywords that help non-designers achieve more consistent and usable results․
The same advice applies to any topic covered in online blogs: readers will come to learn how to take a vague idea and develop a high-quality image using an AI Image Generator with intent․
Typical structures that top posts use
If you’ve seen any other ones on this topic‚ you probably know the general structure at this point: a short introduction for all the benefits of the prompts‚ followed by numbered sections of 10-30 prompt ideas‚ 5-10 style prompts‚ and 3-5 workflows․
That’s the structure here‚ too․
It works because it’s skimmable‚ it’s action-oriented‚ and it gives readers something they can copy-paste and edit as needed․
Similar to the titles‚ the majority of these posts use prompts‚ which writers distill into “scene + subject + style + lighting + aspect ratio” variants across categories‚ including e-commerce‚ travel‚ tech‚ and lifestyle․
The purpose of this formula is to illustrate that a couple of different words can make an enormous difference‚ and that is what we are going to do here․
There is no software name here‚ there is no website link attached․
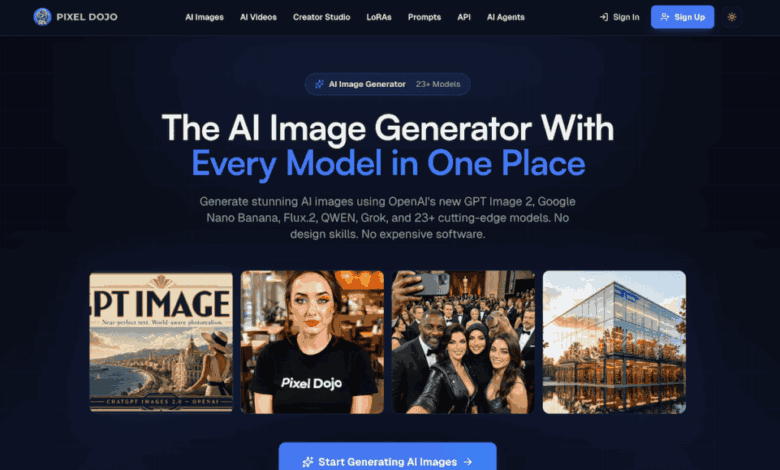
Instead‚ this is a concrete formula that you can use in any AI Image Generator of your choice‚ including PixelDojo․
Creating a strong base prompt formula
A good prompt formula is the foundation of reliable AI image generation․
This is a prompt formula that can be used as a template for different projects with only specific variables changing․
You might start with something like this:
- Scene / context: Where is this happening? (office, jungle, city street, virtual studio, etc.)
- Subject: Who or what is the focus? (person, product, abstract symbol, animal, etc.)
- Style: Artistic direction or aesthetic (realistic, cinematic, cartoon, neon‑cyber, watercolor, etc.)
- Mood / lighting: How does it feel? (warm, dramatic, soft, high‑contrast, minimalist, etc.)
- Technical details: Aspect ratio, detail level, and any constraints (e.g., “no text,” “highly detailed,” “wide shot”).
Combining these elements gives you a prompt like: “A cheerful entrepreneur working at a modern desk in a sunlit home office, realistic style, soft natural lighting, 16:9 aspect ratio, highly detailed, no text overlay.”
From there, you can tweak one or two variables to explore different moods or layouts without starting from scratch.
How to generate 10–30 prompt variations
One of the reasons list‑style posts do so well is that they give readers a ready‑made bank of ideas.
You can follow the same logic by building a small library of prompt variations around a single theme.
For example, if you’re creating visuals for a productivity blog, you might target:
- Different scenes (home office, coworking space, library, café, remote beach setup).
- Different moods (focused, relaxed, overwhelmed, celebrating a win, troubleshooting).
- Different viewpoints (wide shot of the room, close‑up on hands, overhead desk layout, portrait‑style headshot).
For each cluster‚ try changing only one or two words in the prompt․
You can systematically explore and document the variations that achieve the results you want․
You’ll have your own prompt playbook to use for any future projects‚ from a blog header to a social thumbnail or an email banner․
Choosing the right style for each platform
Style choice is where many AI images find their footing or go astray․
Overly familiar styles can be bland or boring‚ while unusual ones can look off-brand․
Some frequently-seen styles in recent tutorials are soft gradients‚ neon-cyber‚ grain overlays‚ and hand-drawn or doodle styles․
These tend to be popular due to how they look on social media feeds and landing pages․
When selecting a style, think about three things:
- Audience expectations: Formal, data‑driven audiences might respond better to clean, realistic visuals, while lifestyle or creative audiences may enjoy more surreal or stylized outputs.
- Brand identity: If your brand leans modern and minimalist, you’ll want to avoid overly busy or cartoonish elements, even if they’re trendy.
- Platform constraints: Certain styles read better on mobile; for example, high‑contrast compositions and bold shapes tend to stand out in crowded social feeds.
Experiment with a few style keywords in your AI Image Generator and save the outputs that feel most aligned with your brand.
Then, standardize those as your “style pack” for future visuals so your content feels cohesive.
Balancing realism and creativity
One of the most subtle lessons in AI image composition today is balancing realism versus creativity․
When appropriate‚ a realistic image can help strengthen the credibility and clarity of a post‚ particularly for product or B2B content․
Still‚ it must not look like a bland stock photo․
Creative elements such as stylized lighting‚ surreal compositions, or extreme angles can help․
One idea is to set a scene very similar to something people recognize‚ but with an impossible or surprising element․
A real office scene might be used as the background scene for a time management blog‚ but with a giant clock on the wall or a calendar with task icons ascending through the air․
These touches may suggest the subject without being literal‚ keeping it more memorable for the viewer․
Making your AI images feel “on brand”
Even if you’re not working with a full design team, you can still create a consistent visual identity.
Start by establishing a few non‑negotiable rules:
- Color palette: Define 3–5 primary colors and use them as a reference in your prompts (“orange‑accented,” “pastel blue and lavender,” etc.).
- Composition preferences: Do you favor centered subjects, rule‑of‑thirds layouts, or overhead shots?
- Level of realism: Decide whether you want photorealistic, semi‑illustrative, or fully stylized outputs as your default.
You can do this at any time by typing something like‚ “A freelance writer at a cozy workspace‚ soft pastel palette‚ slightly stylized but grounded‚ warm lighting‚ 4:5 aspect ratio for social media․”
The input you get is always the same․
This can only help to build your brand over time․
Using AI images for SEO and engagement
In addition to style‚ AI-generated images can help with your content strategy and break up text in your feed with custom images․
They also play an important role as visual signposts in your blog posts that help to guide readers toward important parts of the content․
A good filename‚ alt text‚ and image captions can help with accessibility and search engine optimization, even if SEO is not a goal․
Today‚ authors often insert these AI images into their writing‚ accompanied by a short caption that may elaborate on the prompt to give readers additional context․
In the context of remote work‚ the caption could read: “Generated using a prompt focused on comfort and focus in a home office setup” to provide more information about its creation process․
Final tips for refining your workflow
To get the best out of any AI Image Generator‚ the approach should be an iterative process․
Generate multiple images‚ compare them side-by-side‚ and analyze which features work best (lighting‚ composition‚ color‚ subject location‚ etc․) before making the next request․
Then‚ refine your prompt accordingly and generate again․
The test-compare-refine cycle is exactly what many current guides recommend‚ though they may use different names for their steps․
If you’re using an art generation platform like PixelDojo‚ then you can apply these ideas to that platform as you learn and experiment‚ adapting the structure of your prompts and your styles to its features․
You can build a prompt‚ style, and composition reference library that you can use in an instant when you want to create some new visual element․
By combining simple formulas‚ consistency‚ and a little bit of experimentation‚ you can create images that look as sleek and modern as they are tailored to your needs․